

Hey guys. Welcome to my first blog. Today I am going to show you how to make an animated dialog with flare assets in flutter. Lets get started.
Ahm Ahm. Totally original intro. Not copied from numerous youtube videos at all.
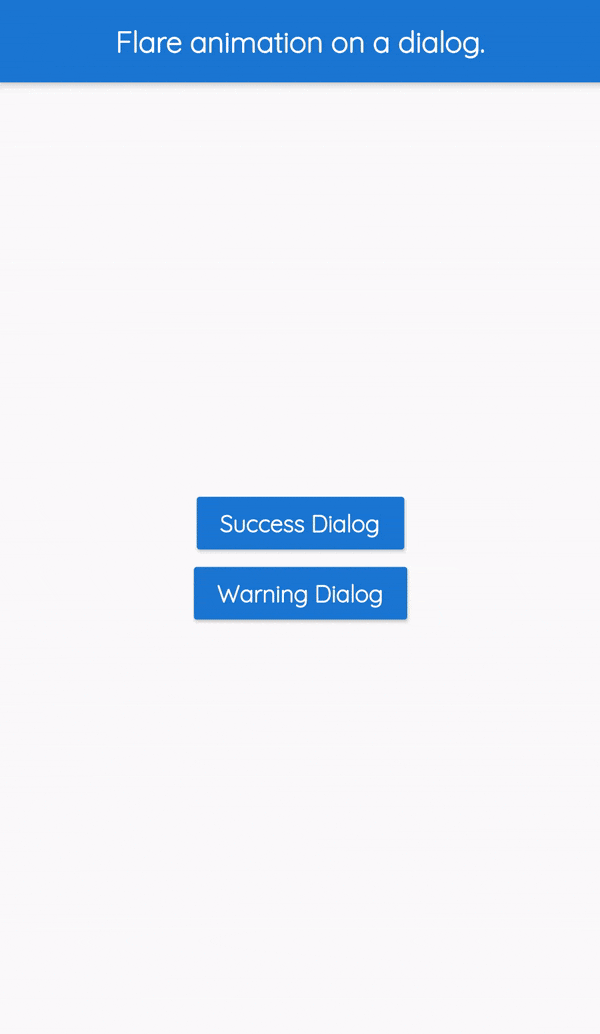
I assume you know how to create and open a sample project by now. So I'll not get into that to keep it short. Lets create a simple screen with two buttons.
class HomePage extends StatelessWidget {
  @override
  Widget build(BuildContext context) {
    return Scaffold(
      appBar: AppBar(
        title: Text(
          "Flare animation on a dialog.",
          style: TextStyle(fontSize: 20, fontWeight: FontWeight.bold),
        ),
        centerTitle: true,
      ),
      body: Center(
        child: Column(
          mainAxisAlignment: MainAxisAlignment.center,
          children: [
            RaisedButton(
                color: Colors.blue[700],
                child: Text(
                  'Success Dialog',
                  style: TextStyle(
                      fontSize: 16,
                      fontWeight: FontWeight.bold,
                      color: Colors.white),
                ),
                onPressed: () => showSuccessDialog(context)),
            RaisedButton(
                color: Colors.blue[700],
                child: Text(
                  'Warning Dialog',
                  style: TextStyle(
                      fontSize: 16,
                      fontWeight: FontWeight.bold,
                      color: Colors.white),
                ),
                onPressed: () => showErrorDialog(context)),
          ],
        ),
      ),
    );
  }
}
Here we have a stateless widget with two button, nothing fancy. Now lets get into main part. We are using flare project in our app which we'll get from rive.app site which is awesome for creating smooth animations. You should check them out.
First of all we will need an animation to show which there are numerous. For this example we'll take files from this awesome guy Bigyan Ghimire ahm... self promotion.. Click open file from the link and on the left drawer you'll see two tabs design and animate. Click animate and you'll see something like this except red arrows and texts.
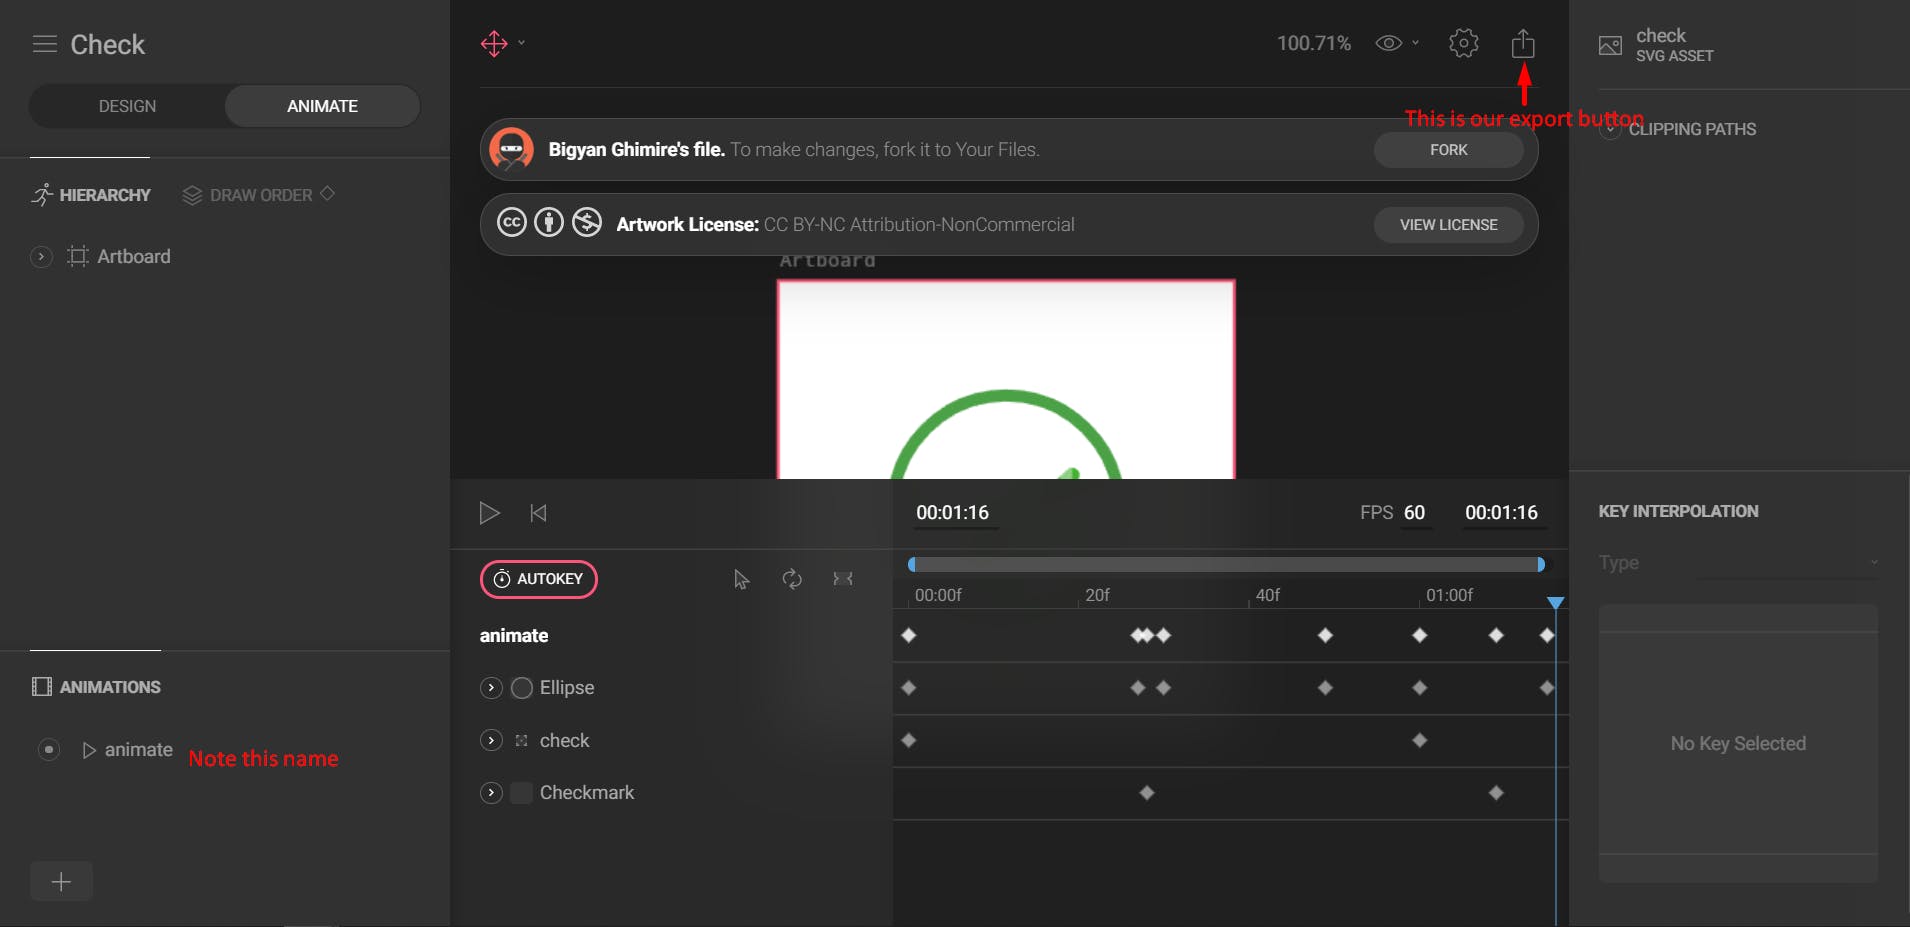
If you want, you can fork and make changes to the project. For now lets use it as it is. You can see in the image, there are two texts. The name of the animation, in this case "animate" is going to be needed later in the project. Press the export button and you'll see something like this.
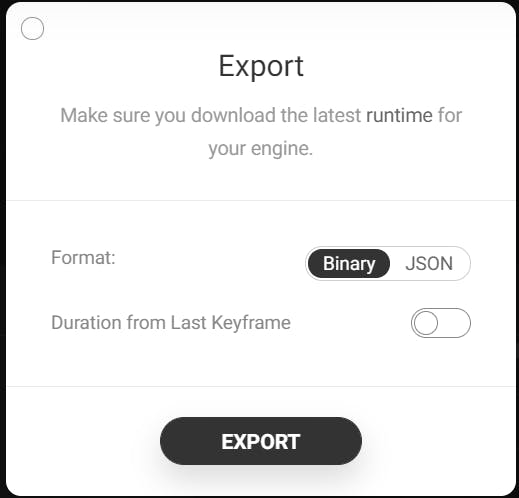
You can export either binary or json. Duration from last keyframe is better turned on because, if there is 5 second project but animation itself is only 2 seconds, it omits the last 3 seconds. When exported, you should see check.flr file downloaded. You'll need to copy that files to asset of your project and and register the asset on pubspec.yaml file like you would do with any other asset or images. We'll do the same with another file called warning.
For flare assets to work on flutter we need a package called flare_flutter . Add flare_flutter on your project. Now we will create those two dialogs.
showSuccessDialog(context) {
    showDialog(
      context: context,
      builder: (context) {
        return AlertDialog(
          title: Text(
            "Mission Successful.",
            style: TextStyle(fontWeight: FontWeight.bold, fontSize: 16),
          ),
          contentPadding: EdgeInsets.all(0),
          content: Column(
            mainAxisSize: MainAxisSize.min,
            children: [
              Container(
                height: 100,
                width: 100,
                child: FlareActor("assets/Check.flr",
                    alignment: Alignment.center,
                    fit: BoxFit.fill,
                    animation: "animate"),
              ),
            ],
          ),
          actions: [
            RaisedButton(
                color: Colors.blue[700],
                child: Text(
                  'Ok',
                  style: TextStyle(
                      fontSize: 16,
                      fontWeight: FontWeight.bold,
                      color: Colors.white),
                ),
                onPressed: () => Navigator.pop(context)),
          ],
        );
      },
    );
  }

  showErrorDialog(context) {
    showDialog(
      context: context,
      builder: (context) {
        return AlertDialog(
          title: Text(
            "Mission failed.",
            style: TextStyle(fontWeight: FontWeight.bold, fontSize: 16),
          ),
          contentPadding: EdgeInsets.all(0),
          content: Column(
            mainAxisSize: MainAxisSize.min,
            children: [
              Container(
                height: 100,
                width: 100,
                child: FlareActor("assets/Warning.flr",
                    alignment: Alignment.center,
                    fit: BoxFit.fill,
                    animation: "Untitled"),
              ),
            ],
          ),
          actions: [
            RaisedButton(
                color: Colors.blue[700],
                child: Text(
                  'Ok',
                  style: TextStyle(
                      fontSize: 16,
                      fontWeight: FontWeight.bold,
                      color: Colors.white),
                ),
                onPressed: () => Navigator.pop(context)),
          ],
        );
      },
    );
  }
Here we added a flare actor which animates the flare file in our assets. Flare actor needs asset name and the animation name which I previously told you to keep in mind. And that's it..... It is done. See, it wasn't that hard. Lets take a look at end results.
Again not the greatest but it gives dialog elegant look than just a check mark. There are tons of ways to utilize flare animations. I'll be posting few more along the way. So stay tuned and peace out :)